
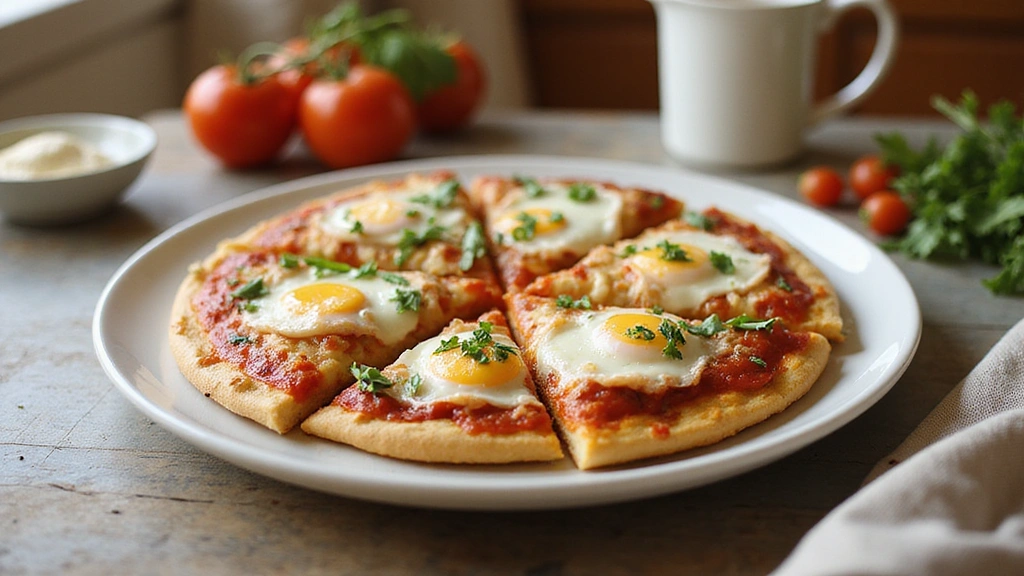
There’s something wonderfully comforting about breakfast pizza, especially when it’s made with Pillsbury pizza crust.
This dish combines the simplicity of pre-made dough with creative toppings that can satisfy any morning craving.
Whether it’s a sunny Saturday or a busy weekday, breakfast pizza is a delightful way to start the day.
With options ranging from traditional eggs and bacon to more adventurous flavors, your mornings will never be the same again.
The History and Cultural Significance
• Breakfast pizzas have emerged as a popular brunch item over the last few decades, particularly in American households.
• Originally inspired by traditional Italian pizza, they evolved to cater to breakfast preferences with toppings like eggs, cheese, and breakfast meats.
• In many families, breakfast pizza is a cherished weekend tradition, symbolizing time spent together around the table.
• While variations exist worldwide, the fundamental concept of combining pizza with breakfast elements remains a beloved approach.
Recipe Overview
Nutritional Information (per serving)
Ingredients
Essential Equipment Guide
Pizza Stone: A pizza stone is crucial for achieving a crispy crust because it retains heat exceptionally well, ensuring even cooking. If you don’t have one, an inverted baking sheet can serve as an alternative. Look for stones that are thick and made of natural materials for best results.
Baking Sheet: A high-quality baking sheet allows for easy transferring of your pizza in and out of the oven. Non-stick sheets are great, but make sure they are oven-safe up to high temperatures. Rimmed sheets can prevent spills from toppings.
Rolling Pin: A good rolling pin helps flatten your Pillsbury pizza dough uniformly, ensuring even thickness and cooking. If you don’t have one, a wine bottle can work in a pinch. Look for a pin that is smooth and easy to handle.
Preparation Methods
Blind Baking: This technique involves pre-baking the pizza crust before adding toppings. It ensures a crispy base and helps prevent sogginess. To master it, keep an eye on the crust and remove it once it’s lightly golden.
Scrambling Eggs: Soft scrambling eggs requires gentle heat and constant stirring for fluffy results. Use a non-stick skillet and avoid overcooking, as eggs will continue to cook after being removed from heat.
Layering Ingredients: Proper layering of toppings is crucial for even cooking and flavor distribution. Start with heavier ingredients like cheese and meats at the bottom, and lighter ones like vegetables on top.
Step 1: Preheat the Oven

Begin by preheating your oven to 425°F (220°C).
This temperature is ideal for achieving a crispy crust.
Make sure to give the oven enough time to heat thoroughly.
A well-preheated oven ensures that the crust cooks evenly from the start.
Step 2: Roll Out the Dough

Take the Pillsbury pizza crust out of its packaging and place it on a lightly floured surface.
Using a rolling pin, gently roll out the dough into a circular shape.
Aim for a thickness of about 1/4 inch for a balanced crust.
Ensure the dough is evenly rolled to avoid uneven cooking.
Step 3: Transfer to Baking Sheet

Carefully transfer the rolled-out dough onto a baking sheet lined with parchment paper.
Press the dough gently to fit the shape of the sheet, ensuring there are no gaps.
Pre-cut any excess dough hanging over the edges if necessary.
This preparation helps in easy handling once the pizza is baked.
Step 4: Blind Bake the Crust

Place the baking sheet with the dough into the preheated oven and bake for 8-10 minutes.
You want the crust to be lightly golden but not fully cooked.
Keep an eye on it to prevent over-baking.
This step is crucial for a crispy base when you add the toppings.
Step 5: Prepare the Egg Mixture

In a mixing bowl, combine the beaten eggs, salt, and pepper.
Whisk the mixture until it is frothy and well combined.
This aeration helps create fluffy scrambled eggs.
Set this mixture aside while you prepare the other toppings.
Step 6: Sauté Vegetables

In a skillet over medium heat, add a splash of oil and sauté the diced bell pepper and onion.
Cook them until they are softened and slightly caramelized, about 5 minutes.
This enhances their flavors and brings out sweetness.
Remove from heat and set aside to cool slightly.
Step 7: Assemble the Pizza

Spread the cooked bacon evenly over the pre-baked crust.
Next, pour the egg mixture over the bacon and distribute it evenly.
Sprinkle the sautéed vegetables on top, followed by the shredded cheese.
Layering the toppings this way ensures even cooking and flavor distribution.
Step 8: Bake the Pizza

Return the assembled pizza to the oven and bake for an additional 10-12 minutes.
Look for the cheese to be melted and bubbly, and the edges of the crust to be golden brown.
This final bake allows all flavors to meld together.
Keep a close watch to prevent burning.
Step 9: Let it Cool

Once baked, carefully remove the pizza from the oven and let it cool for a few minutes.
This cooling period helps set the toppings and makes it easier to slice.
Use a pizza cutter for clean slices.
Allowing it to cool slightly enhances the flavor as well.
Step 10: Serve and Enjoy

Slice the pizza into wedges and serve warm.
Garnish with fresh herbs like parsley or chives for added flavor.
This pizza pairs wonderfully with a side of fruit or a fresh salad.
Enjoy your creative breakfast with family and friends!
Critical Timing and Temperature Guide
Blind Baking the Crust: Bake the crust at 425°F for 8-10 minutes until lightly golden. Avoid baking too long to prevent over-drying.
Baking with Toppings: Bake at the same temperature for 10-12 minutes, watching for bubbling cheese and golden edges. Common mistakes include not baking long enough for the egg to set.
Cooling Time: Allow the pizza to cool for at least 5 minutes before slicing. This helps the toppings set and prevents messy servings.
Pro Tips for Pillsbury Pizza Crust Recipes Breakfast Quick & Creative
• Ingredient Selection: Using high-quality eggs and cheese can significantly enhance the flavor of your breakfast pizza.
• Preparation Secret: Slightly undercook the eggs during the sautéing process for ideal fluffiness in the final bake.
• Temperature Management: Ensure your oven is fully preheated before baking to achieve a perfectly crispy crust.
• Texture Enhancement: For a crunchier crust, consider using a pizza stone that absorbs moisture.
• Flavor Layering: Infuse your toppings with herbs or spices during the sautéing process to build depth.
• Make-Ahead Strategies: Prepare the pizza crust and toppings a day in advance, storing them separately until ready to bake.
• Restaurant-Quality Finishing Touches: Drizzle with a bit of olive oil or a sprinkle of freshly cracked pepper just before serving for an upscale finish.
• Equipment Optimization: If you don’t have a pizza stone, use a heavy baking sheet to mimic the same effect.
Troubleshooting Common Issues
• Crust Too Soggy: This often occurs from not blind baking long enough. Ensure the crust is firm and golden before adding toppings.
• Eggs Overcooked: If your eggs are rubbery, remove them from heat as soon as they are set and still a little runny. They will continue cooking in the oven.
• Flavor Lacking: If the pizza tastes bland, consider adding more salt, pepper, or fresh herbs to the egg mixture for enhanced flavor.
• Toppings Uncooked: If vegetables are still crunchy, pre-cook them to the desired tenderness before adding them to the pizza.
• Cheese Not Melting: Ensure you are using a cheese that melts well; if not, consider blending with mozzarella for better melting properties.
Variations and Regional Differences
• Italian Breakfast Pizza: This version incorporates traditional Italian ingredients like prosciutto, arugula, and ricotta for a gourmet twist.
• Southwestern Style: Featuring toppings like chorizo, jalapeños, and pepper jack cheese, this variation adds a spicy kick to the classic breakfast pizza.
• Vegetarian Delight: Loaded with fresh spinach, mushrooms, and feta cheese, this version caters to vegetarian preferences without sacrificing flavor.
• Modern Interpretations: Incorporating ingredients like avocado or smoked salmon reflects current food trends while maintaining the essence of breakfast pizza.
Food Science Behind the Recipe
• Maillard Reaction: This chemical reaction between amino acids and reducing sugars gives the crust its golden-brown color and enhances flavor. Understanding this helps you achieve the perfect bake.
• Emulsification: The mixing of eggs with other ingredients creates a rich and creamy texture, which is essential for the filling of your pizza. Knowing how to emulsify can elevate the dish’s mouthfeel.
• Gelatinization: This occurs when starches in the pizza crust absorb moisture and swell during baking, resulting in a tender yet crispy crust. Mastering this can help you achieve the perfect texture.
Frequently Asked Questions
What’s the most common mistake people make when preparing breakfast pizza? The most common mistake is not blind baking the crust, which can lead to a soggy bottom. Always ensure it’s pre-baked before adding toppings.
Can I prepare components of this dish in advance? Yes, you can prepare the dough and toppings a day ahead and store them separately in the fridge. Assemble just before baking.
How do I adapt this recipe for dietary restrictions? For gluten-free options, substitute with gluten-free pizza crust. For dairy-free, opt for non-dairy cheese alternatives.
What’s the best way to store and reheat leftovers? Store leftovers in an airtight container in the refrigerator for up to 3 days. Reheat in the oven at 350°F until warmed through.
Can I freeze this dish? Yes, you can freeze the assembled pizza before baking. Wrap tightly in plastic wrap and aluminum foil for up to 3 months, thaw in the refrigerator before baking.
What wine or beverages pair best with this dish? A light-bodied white wine, like a Sauvignon Blanc, complements the flavors well, or serve with a refreshing mimosa.
How can I scale this recipe up for a crowd? Simply double the recipe and use larger baking sheets or multiple sheets, adjusting the baking time slightly if necessary.
What side dishes complement this recipe best? A fresh fruit salad or a light green salad pairs well, balancing the richness of the pizza.
How do professional chefs elevate this dish for restaurant service? Chefs often add gourmet toppings like truffle oil or freshly shaved parmesan to enhance the dish’s appeal.
Serving and Presentation Guide
• Traditional Presentation: Serve the pizza on a wooden cutting board, garnished with fresh herbs like basil or parsley, with slices cut and arranged neatly.
• Modern Plating Ideas: Use a round white plate and drizzle balsamic reduction around the pizza for a contemporary touch.
• Accompaniment Suggestions: Serve with a side of mixed green salad dressed with vinaigrette to balance the meal.
• Special Occasion Presentation: For brunch gatherings, consider serving the pizza on a large platter with a variety of toppings, allowing guests to customize their slices.
Conclusion
I encourage you to try this delightful breakfast pizza recipe that’s as versatile as it is delicious.
With just a few easy steps, you can create a dish that brings joy to your mornings.
Experiment with different toppings to make it your own and enjoy the process of cooking with family or friends.