Mini loaf pan recipes bring a delightful twist to breakfast, combining convenience with creativity.
These adorable little loaves are perfect for portion control and make breakfast feel special without extra effort.
Imagine waking up to the warm, inviting aroma of freshly baked goods that are not only cute but also bursting with flavor.
Whether you’re making them for a family brunch or meal prepping for the week, these mini loaves are sure to satisfy everyone’s taste buds.
The History and Cultural Significance
• Mini loaf pan recipes trace their origins to the early 20th century, where baking in small pans became popular in American households.
• The dish evolved as home bakers began experimenting with flavors and ingredients, leading to a variety of sweet and savory options.
• In many cultures, these mini loaves are often served at breakfast gatherings or brunches, symbolizing comfort and home cooking.
• While many variations exist across different regions, the authentic version maintains the use of simple, quality ingredients that elevate the experience.
Recipe Overview
Nutritional Information (per serving)
Ingredients
Essential Equipment Guide
Mini Loaf Pan: This specific tool is essential for creating perfectly portioned loaves that bake evenly. Look for a non-stick option to prevent sticking, and consider pans made of heavy-duty metal for even heat distribution.
Mixing Bowls: High-quality mixing bowls are crucial for combining ingredients effectively. Choose glass or stainless steel for durability, and ensure they are large enough to handle your mixing needs without spilling.
Measuring Cups and Spoons: Accurate measurements are vital for baking success. Invest in a set that includes both dry and liquid measuring cups to ensure precision in your ingredient quantities.
Preparation Methods
Mixing Techniques: Proper mixing ensures a uniform batter and prevents overworking the flour, which can lead to dense loaves. Use a gentle folding motion when adding dry ingredients to wet to maintain airiness.
Greasing the Pans: To prevent sticking, grease your mini loaf pans thoroughly with butter or a non-stick spray. Make sure to cover all corners and edges for easy removal after baking.
Cooling the Loaves: Allow the loaves to cool in the pans for about 10 minutes before transferring them to a wire rack. This helps set the structure and prevents sogginess from steam.
Step 1: Preheat the Oven

Begin by preheating your oven to 350°F (175°C).
This ensures that your mini loaves start baking at the right temperature.
A properly preheated oven is crucial for achieving the desired rise and texture.
Use an oven thermometer to verify accuracy if you doubt your oven’s calibration.
Step 2: Prepare the Mini Loaf Pans

Grease each mini loaf pan thoroughly with butter or non-stick spray.
Make sure to cover all sides to prevent the batter from sticking.
Using a pastry brush can help spread the grease evenly.
Set the greased pans aside while you prepare the batter.
Step 3: Mix Dry Ingredients

In a large mixing bowl, combine the flour, sugar, baking powder, baking soda, and salt.
Using a whisk, mix these dry ingredients until evenly blended.
This step is essential to ensure the leavening agents are distributed throughout the flour.
Set this bowl aside as you prepare the wet ingredients.
Step 4: Mix Wet Ingredients

In another bowl, whisk together the eggs, milk, and melted butter until combined.
Next, stir in the vanilla extract to incorporate the flavor.
This mixture should be smooth and well blended, creating a nice base for your batter.
Ensure the butter is not too hot to avoid cooking the eggs.
Step 5: Combine Wet and Dry Ingredients

Pour the wet ingredients into the bowl with the dry ingredients.
Gently fold the mixtures together using a spatula, being careful not to overmix.
You want to see a few lumps in the batter, which indicates a lighter loaf.
Add the blueberries at this stage and fold them in gently.
Step 6: Fill the Mini Loaf Pans

Spoon the batter evenly into the prepared mini loaf pans.
Fill each pan about 2/3 full to allow space for rising.
Use a small ice cream scoop for uniform portions if you have one.
Smooth the tops with the back of a spoon for an even appearance.
Step 7: Add Toppings (Optional)

If desired, sprinkle crumb topping over the batter in each loaf pan.
This adds a delightful crunch to the texture of the finished loaves.
Make sure to distribute it evenly for consistent baking.
You can also add a light dusting of powdered sugar after baking for a decorative touch.
Step 8: Bake the Mini Loaves

Place the filled pans in the preheated oven and bake for 25-30 minutes.
Check for doneness by inserting a toothpick into the center; it should come out clean.
The loaves should be golden brown on top and slightly spring back when touched.
Avoid opening the oven door too soon to prevent them from collapsing.
Step 9: Cool the Loaves

Once baked, remove the pans from the oven and let them cool for about 10 minutes.
Run a knife around the edges to loosen them before turning them out onto a wire rack.
This cooling step is essential to set the texture and flavor.
Let them cool completely before serving to enjoy the best taste.
Step 10: Serve and Enjoy

Once cooled, slice the mini loaves as desired and serve them warm.
These delightful loaves are perfect with a pat of butter or a drizzle of honey.
Consider pairing them with fresh fruit or yogurt for a complete breakfast.
Enjoy the flavors and textures that make these loaves a breakfast favorite!
Critical Timing and Temperature Guide
Baking Time: Bake the mini loaves for 25-30 minutes at 350°F (175°C). Look for a golden top and a toothpick that comes out clean when inserted into the center. Common mistakes include underbaking, which can result in a gooey center, or overbaking, which dries out the loaves.
Cooling Time: Allow the loaves to cool in the pans for 10 minutes before transferring them to a wire rack. This helps set the structure and ensures easy removal. Skipping this step may cause the loaves to break apart.
Serving Temperature: These loaves are best served warm or at room temperature. Reheating in the oven for a few minutes before serving enhances the flavors and textures.
Pro Tips for Mini Loaf Pan Recipes Breakfast Cute And Tasty Ideas
• Ingredient Selection: Always use fresh, high-quality ingredients, especially for eggs and dairy, as they significantly impact the final flavor.
• Preparation Secret: Allow eggs and milk to reach room temperature before mixing; this helps create a smoother batter and better rise.
• Temperature Management: Ensure your oven is fully preheated to prevent uneven baking and texture issues.
• Texture Enhancement: For a tender crumb, avoid overmixing after adding the wet ingredients.
• Flavor Layering: Consider adding spices like cinnamon or nutmeg to deepen the flavor profile.
• Make-Ahead Strategies: The batter can be prepared the night before and stored in the fridge; bake in the morning for fresh loaves.
• Restaurant-Quality Finishing Touches: Drizzle with a simple glaze made of powdered sugar and milk for a professional look.
• Equipment Optimization: Use light-colored pans for even baking; dark pans can cause over-browning.
Troubleshooting Common Issues
• Loaves Too Dense: This can occur from overmixing the batter. To fix this, mix until just combined, and consider sifting dry ingredients.
• Uneven Baking: If your loaves bake unevenly, check your oven’s calibration and rotate the pans halfway through baking.
• Sticking to the Pan: Ensure thorough greasing of the pans. If they still stick, try lining with parchment paper for easier removal.
• Dry Texture: Overbaking can lead to dryness. Keep an eye on the baking time and check for doneness a few minutes earlier.
• Flavor Lacking: If the flavor seems flat, consider adding more vanilla or spices to enhance the taste profile.
Variations and Regional Differences
• Italian Herb Mini Loaves: Infused with herbs like rosemary and oregano, these loaves offer a savory twist perfect for breakfast or brunch.
• Chocolate Chip Mini Loaves: Adding chocolate chips creates a sweet, indulgent version that appeals to those with a sweet tooth.
• Banana Nut Mini Loaves: A classic variation using ripe bananas and walnuts, this version is moist and packed with flavor.
• Modern Interpretations: Incorporating alternative flours like almond or coconut flour caters to gluten-free diets while maintaining delicious flavors.
Food Science Behind the Recipe
• Leavening Agents: Baking powder and baking soda create carbon dioxide bubbles that help the batter rise, resulting in a light and fluffy texture.
• Fat in Baking: The melted butter adds moisture and richness, contributing to a tender crumb, while also enhancing flavor.
• Eggs as Binders: Eggs provide structure and stability in baked goods, helping to keep the loaves intact and contributing to a soft texture.
Frequently Asked Questions
What’s the most common mistake people make when preparing mini loaf recipes? Overmixing the batter is a common mistake that leads to dense loaves. Mix just until combined to preserve lightness.
Can I prepare components of this dish in advance? Yes! You can prepare the batter the night before and refrigerate it, then bake in the morning for fresh loaves.
How do I adapt this recipe for dietary restrictions? Substitute all-purpose flour with gluten-free flour blends, and use plant-based milk and butter for dairy-free options.
What’s the best way to store and reheat leftovers? Store in an airtight container at room temperature for up to 3 days. Reheat in the oven at 350°F for 5-10 minutes.
Can I freeze this dish? Yes, freeze the baked mini loaves wrapped tightly in plastic wrap for up to 3 months. Thaw in the fridge overnight before reheating.
What wine or beverages pair best with this dish? A light sparkling wine or fresh-squeezed orange juice complements the sweetness of the loaves beautifully.
How can I scale this recipe up for a crowd? Simply double or triple the ingredients, and use additional mini loaf pans or larger loaf pans as needed.
What side dishes complement this recipe best? Fresh fruit salad or Greek yogurt pairs well, offering a refreshing contrast.
How do professional chefs elevate this dish for restaurant service? Chefs often add gourmet toppings like whipped mascarpone or seasonal fruit compotes for an upscale finish.
Serving and Presentation Guide
• Traditional Presentation: Serve the mini loaves on a rustic wooden board with a side of butter and seasonal fruit for a homestyle feel.
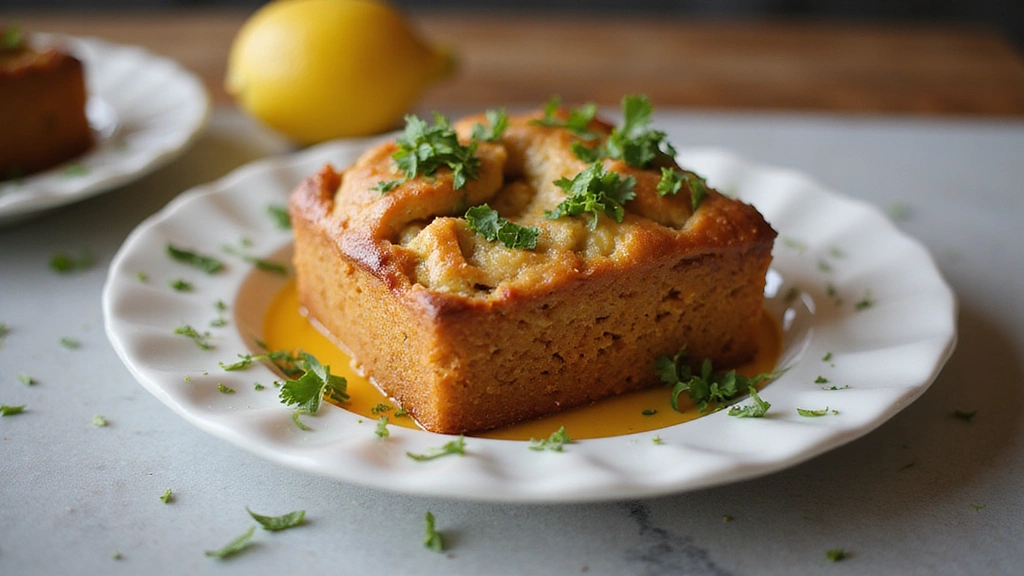
• Modern Plating Ideas: Stack the loaves vertically with a drizzle of glaze and fresh herbs for a contemporary touch.
• Accompaniment Suggestions: Pair with a light salad or yogurt parfait for a balanced breakfast spread.
• Special Occasion Presentation: For celebrations, serve with a selection of mini loaves on a tiered stand, garnished with edible flowers for elegance.
Conclusion
I hope this mini loaf pan recipe inspires you to get creative in your kitchen.
These cute and tasty breakfast options are sure to bring joy to your morning routine.
Whether for a special occasion or a simple weekday treat, don’t hesitate to experiment with flavors and fillings.