
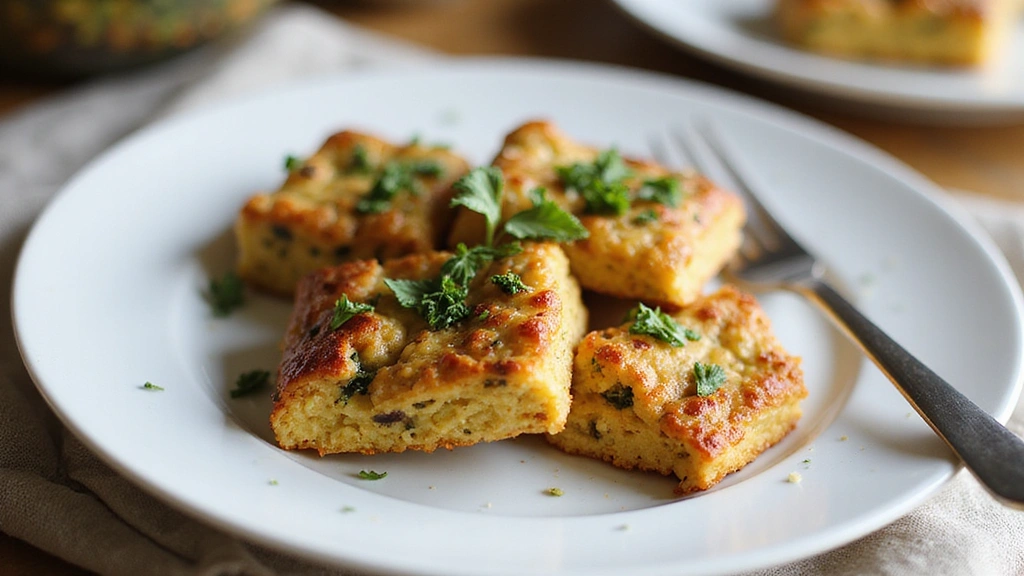
Whole 30 Breakfast Bar Recipes are a fantastic way to kickstart your day while adhering to clean eating principles.
These bars combine wholesome ingredients that are both nutritious and delicious, making breakfast effortless and enjoyable.
I stumbled upon these recipes while searching for easy, healthy options during my Whole 30 journey, and they quickly became a staple in my morning routine.
Whether you need a quick breakfast on-the-go or a satisfying mid-morning snack, these bars deliver on taste and nourishment.
The History and Cultural Significance
• Whole 30 Breakfast Bar Recipes have emerged from the modern clean eating movement, particularly within the health-conscious community.
• The concept of creating portable, nutritious breakfast options has evolved as more people seek convenient ways to maintain healthy diets.
• In health-focused cultures, these bars are often enjoyed as part of meal prep routines, symbolizing a commitment to wellness and self-care.
• While there are many variations worldwide, the essential characteristic of these bars remains their use of whole, unprocessed ingredients.
Recipe Overview
Nutritional Information (per serving)
Ingredients
Essential Equipment Guide
Food Processor: A food processor is crucial for quickly chopping nuts, blending ingredients, and achieving the desired texture for your breakfast bars. Look for a model with a strong motor and multiple blade attachments for versatility.
Mixing Bowl: A large mixing bowl is essential for combining ingredients evenly without spills. Opt for a sturdy, non-slip bowl that can withstand vigorous mixing.
Baking Pan: A quality baking pan ensures even cooking and easy removal of the bars. Choose a non-stick or parchment-lined pan to facilitate clean-up and prevent sticking.
Preparation Methods
Chopping Nuts: Chopping nuts evenly is essential for a consistent texture in your breakfast bars. Use a sharp knife or a food processor to achieve uniform pieces, which will help with even distribution throughout the bars.
Mixing Ingredients: Properly mixing your ingredients ensures that every bite is flavorful. Use a spatula to fold in the dry and wet ingredients until just combined, being careful not to overmix.
Baking Evenly: For best results, spread the mixture evenly in the prepared baking pan. Use the back of a spatula to press down firmly, which will help the bars maintain their shape during baking.
Step 1: Prepare Ingredients

Begin by measuring out all your ingredients accurately.
Gather your rolled oats, nuts, nut butter, honey, dried fruit, and dark chocolate chips.
Having everything prepped will streamline your cooking process.
Make sure to chop your nuts and dried fruit into small, even pieces for consistency.
Step 2: Mix Dry Ingredients

In a large mixing bowl, combine the rolled oats, chopped nuts, and cinnamon.
Stir the dry ingredients together until evenly distributed.
Look for a uniform mix without any clumps.
This step enhances the flavor profile of the bars by ensuring each bite has a balanced taste.
Step 3: Combine Wet Ingredients

In a separate bowl, mix the nut butter and honey until smooth.
You may need to warm the nut butter slightly for easier mixing.
Ensure there are no lumps in the mixture for a consistent flavor.
This step is critical for binding the dry ingredients together.
Step 4: Mix Everything Together

Pour the wet mixture into the bowl of dry ingredients.
Gently fold the mixture together using a spatula until combined.
Be careful not to overmix, which can lead to dense bars.
The goal is to have a sticky, cohesive mixture.
Step 5: Add Dried Fruit and Chocolate Chips

Once the mixture is combined, fold in the chopped dried fruit and dark chocolate chips.
This adds sweetness and texture to the bars.
Ensure even distribution to get a bit of each add-in in every bite.
This step enhances the overall appeal and flavor balance.
Step 6: Prepare the Baking Pan

Line a baking pan with parchment paper, allowing some overhang on the sides.
This will help with easy removal after baking.
Make sure the parchment is smooth against the pan to avoid creases in the bars.
Greasing the pan lightly can also help prevent sticking.
Step 7: Transfer the Mixture to the Pan

Spoon the mixture into the prepared baking pan, spreading it evenly.
Use the back of a spatula to press it down firmly.
Look for an even surface across the top to ensure even baking.
This step is vital for the bars to hold their shape once baked.
Step 8: Bake the Bars

Preheat your oven to 350°F (175°C) before baking.
Place the baking pan in the oven and bake for 20 minutes.
Look for a lightly golden edge as an indicator of doneness.
Avoid overbaking to keep the bars chewy.
Step 9: Cool the Bars

Once baked, remove the pan from the oven and let it cool in the pan for about 10 minutes.
After cooling, use the parchment overhang to lift the bars out of the pan.
Allow them to cool completely on a wire rack.
This step is important for achieving the right texture before cutting.
Step 10: Cut into Bars

Once completely cool, use a sharp knife to cut the bars into even squares.
Aim for uniform sizes to ensure even portioning.
A clean knife will make cutting easier and prevent crumbling.
This step also makes it easier to store and serve the bars.
Step 11: Store the Bars

Store the bars in an airtight container at room temperature for up to a week.
For longer storage, consider freezing them.
Separate layers with parchment paper to avoid sticking.
This step ensures your bars stay fresh for later enjoyment.
Critical Timing and Temperature Guide
Baking Time: Bake the bars for exactly 20 minutes at 350°F (175°C). Look for a golden brown edge, which indicates they are properly cooked. Avoid opening the oven door frequently, as this can cause temperature fluctuations.
Cooling Time: Allow the bars to cool in the pan for 10 minutes before transferring them to a wire rack. This helps them set properly and prevents crumbling when cutting.
Storage Temperature: Store bars at room temperature in an airtight container. If freezing, ensure they are well-wrapped to prevent freezer burn.
Pro Tips for Whole 30 Breakfast Bar Recipes Clean Eating Made Easy
• Ingredient Selection: Choose high-quality nut butter without added sugars or oils for the best flavor and texture.
• Preparation Secret: Allow your nut butter to come to room temperature for easier mixing, which can enhance the binding of ingredients.
• Temperature Management: Ensure your oven is fully preheated before baking to promote even cooking.
• Texture Enhancement: Press the mixture firmly into the pan to achieve a denser, chewier bar.
• Flavor Layering: Consider adding spices like nutmeg or vanilla extract for extra depth of flavor.
• Make-Ahead Strategies: Prepare a double batch and freeze half for quick breakfasts during busy weeks.
• Restaurant-Quality Finishing Touches: Drizzle melted dark chocolate over the bars after cooling for an elegant presentation.
• Equipment Optimization: A good quality food processor can save time and effort in chopping and mixing ingredients.
Troubleshooting Common Issues
• Bars Crumble Too Much: This usually indicates insufficient binding. Ensure you’re using enough nut butter and honey for proper cohesion. If it happens, try adding a little more nut butter to the mixture next time.
• Bars Too Dense: Overmixing the ingredients can lead to dense bars. Mix until just combined for a lighter texture, and be mindful of baking time.
• Uneven Baking: If the bars brown too quickly, your oven may have hot spots. Rotate the pan halfway through baking for even results.
• Flavor Too Bland: If your bars lack flavor, consider adding more spices like cinnamon or a pinch of sea salt to enhance the overall taste.
• Sticking to the Pan: Ensure the baking pan is lined properly with parchment paper and lightly greased. This will help prevent sticking and make removal easier.
• Not Chewy Enough: Ensure you’re using enough sticky ingredients like nut butter and honey, as they contribute to the chewiness of the bars.
Variations and Regional Differences
• Nut-Free Version: Replace nut butter with sunflower seed butter for a nut-free option suitable for schools or nut allergies.
• Chocolate Chip Variation: Use cacao nibs instead of chocolate chips for a more intense chocolate flavor without added sugar.
• Seasonal Flavors: Incorporate pumpkin spice in the fall or coconut flakes in the summer for a seasonal twist.
• Modern Interpretations: Experiment with adding protein powder to boost the nutritional profile while keeping the bars Whole 30 compliant.
Food Science Behind the Recipe
• Binding Agents: Nut butter and honey act as binding agents, holding the ingredients together and enhancing texture. Understanding their properties helps you adjust ratios for different results.
• Maillard Reaction: The browning that occurs during baking is due to the Maillard reaction, which enhances flavor. Proper baking time and temperature are crucial for achieving this.
• Moisture Retention: The combination of oats and nut butter helps retain moisture, preventing the bars from drying out. Knowing how these ingredients interact can lead to better texture.
Frequently Asked Questions
What’s the most common mistake people make when preparing Whole 30 Breakfast Bars? The most common mistake is not measuring ingredients accurately, leading to imbalanced flavors and textures. Always use measuring cups and spoons for precision.
Can I prepare components of this dish in advance? Yes, you can prepare the dry and wet ingredients separately ahead of time. Store them in airtight containers until you are ready to mix and bake.
How do I adapt this recipe for dietary restrictions? For gluten-free needs, ensure you use certified gluten-free oats. For nut allergies, substitute with seeds like sunflower or pumpkin.
What’s the best way to store and reheat leftovers? Store bars in an airtight container at room temperature for up to a week, or freeze for longer storage. Reheat in the microwave for a few seconds to restore softness.
Can I freeze this dish? Yes, freeze the bars in an airtight container or freezer bag. Thaw in the refrigerator overnight before consuming.
What wine or beverages pair best with this dish? A light herbal tea or fresh fruit juice pairs nicely with these breakfast bars, complementing their natural sweetness.
How can I scale this recipe up for a crowd? To double the recipe, simply multiply all ingredients by two and use a larger baking pan. Ensure to adjust baking time as needed.
What side dishes complement this recipe best? Fresh fruit or a green smoothie pairs well with these bars for a balanced breakfast.
How do professional chefs elevate this dish for restaurant service? Professional chefs often add fresh herbs or edible flowers as a garnish, enhancing visual appeal and flavor.
Serving and Presentation Guide
• Traditional Presentation: Serve the bars on a wooden or ceramic platter, garnished with fresh fruit or a drizzle of honey. This adds a rustic touch and makes for an inviting display.
• Modern Plating Ideas: Cut bars into different shapes and stack them for a contemporary look. Serve with a small bowl of fresh fruit on the side for color contrast.
• Accompaniment Suggestions: Pair with a dollop of almond yogurt or a side of seasonal berries to enhance the breakfast experience.
• Special Occasion Presentation: Arrange the bars on a tiered cake stand with decorative nuts and fruits around them for a festive touch.
Conclusion
I hope you give these Whole 30 Breakfast Bar Recipes a try and enjoy their deliciousness as much as I do.
They are perfect for busy mornings and can easily fit into a clean eating lifestyle.
With a bit of preparation, you can have a healthy breakfast ready to go any day of the week.